And the second tutorial I promised to share is about Ultramarine Sergeant, "advanced painting level". More
attention to preparing miniature, to the base, adding colors in
shadows, freehands and so on - there's no limits to create a good
miniature for your collection )!


1. Choice of miniature and conversion.
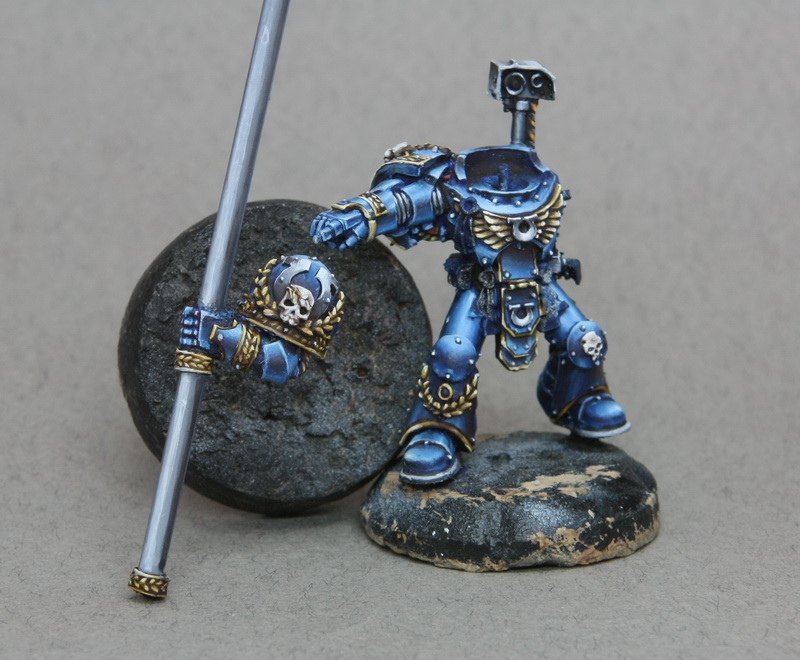
I like the Sergeant Chronus miniature: interesting pose, pointing right hand, high detalization, ... but I didn't like the left hand with pistol so I've changed it with banner. No tank commander in this case, but it's better for me. And a lot of surface to train freehands ).
2. Base construction.
I didn't want to do something global (vignette or diorama), I just wanted to save his standart game base.It was obviosly for me that he has to stay on some hill, and the most simple hill in 40k is a pile of rabbish.
My results on this stage:

3. Dismemberment ).
I prefer to divide miniature by the principle of comfortable painting - there should not remain places which is hard to reach. Also it is important do not spoil the others parts during long time working (flag, for example). So the sergeant was divided into 6 pinned and ready for painting parts: body, hand, head, flag, backpack and base. Then I will assemble ang glue it all.

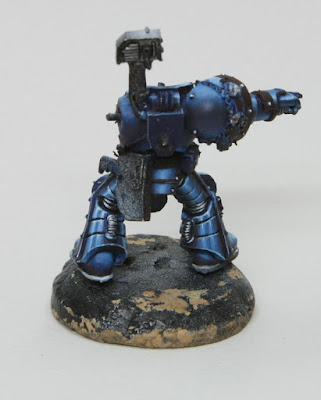
4. Priming
Each paint has some degree of transparency, so color of the primer is very important for us. In most cases, I use a light gray primer. But now I'll combine black and white primer.
I used black primer for all parts where good shadows were needed. Then I cover it with white primer imitating lighting from my light source. And I used grey and white primer for those parts, which don't needed deep shadow and I wanted to leave them bright (flag and head).
I used black primer for all parts where good shadows were needed. Then I cover it with white primer imitating lighting from my light source. And I used grey and white primer for those parts, which don't needed deep shadow and I wanted to leave them bright (flag and head).

!!! Keep all details correctly oriented to "the light source" on this stage!

5. Painting
Armor
Base - VMC Dark Prussia Blue, three thin layers.
I wanted to paint shiny armor for Sergeant so I'll do as much contrast as I can on it. And a lot of reflexes. Pictures of metal miniature before priming can help me in reflexes positions and right highlights, so I often use this hint:


Then I started with 1st highlights using VMC Dark Prussia Blue + white. Now I wanted to make some kind of "map" to see how it will look on whole model:

And then I add shadows (VMC Dark Prussia Blue + black) and light (VMC Dark Prussia Blue + white) painting light parts and reflexes till it will be enough for me. I will add additional color to reflexes later, when I'll see another details and their color.
The process is laborious and boring (
The process is laborious and boring (


Now it's time to add more color in shadows to gain more contrast and attractive view. Shadow color always has opposite temperature to light color. So if light is warm (yellow, orange..) we have cold shadows (blue, violet, green). If the light is cold (blue - this is my case), the shadows should be warm. So I used red-brown color VMC Black red + Matt medium and glazed it to the shadows.


I think that the main work with armor was done and it's time to go further. All metal and gold parts were done here with NMM (non metal metalic) techniques.
Gold
1. Base Rhinox hide
2. snakebite leather or analogs
3. Bubonic brown or analogs
4. Bubonic brown + white till pure white
5. Red-brown glaze in shadows
5. Red-brown glaze in shadows
Step1


Step 3:

Step 4 and 5


Steel
My standard scheme of steel NMM:1. Base - neutral grey
2. Shadows - grey + black
3. Highlights - grey + white
4. Glazing shadows with color
If I want to add some color to the steel - some blue or turquoise tint, I add it to the base. But here I used only grey with red-brown glazes on step 4.
Corrugations:


Visor, 4 steps:


Result with steel details:


Details
Wires:


Sculls (light brown - bone - ivory - white):


Purity seals and scrolls. The main thing here is don't do sculls and scrolls in the same color. I added more yellow to scrolls to divide materials.

Gems and lens.
Here's good scheme for painting gems and lens


Now I have:


Freehands.
usually I search some pictures of photos in the web, then try to draw something from all of it. So I've found these pictures and print them to have before my eyes.


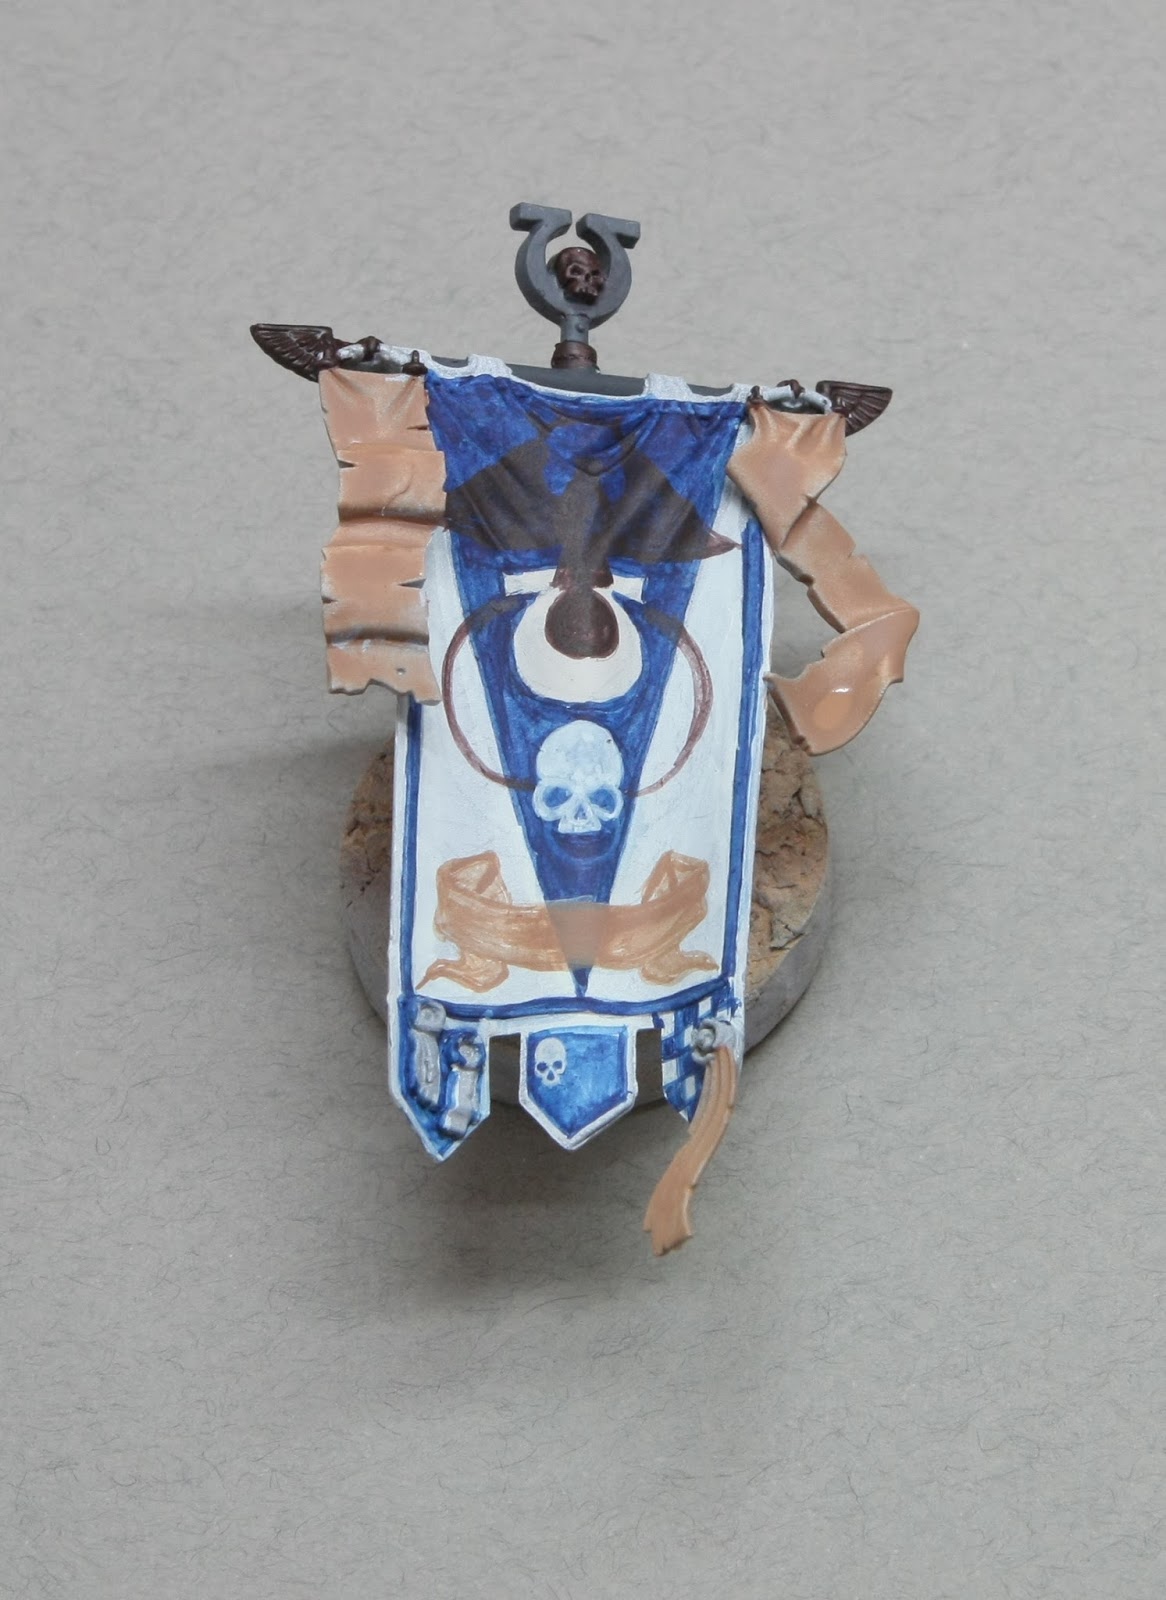


Symbols on the armor:


Result:

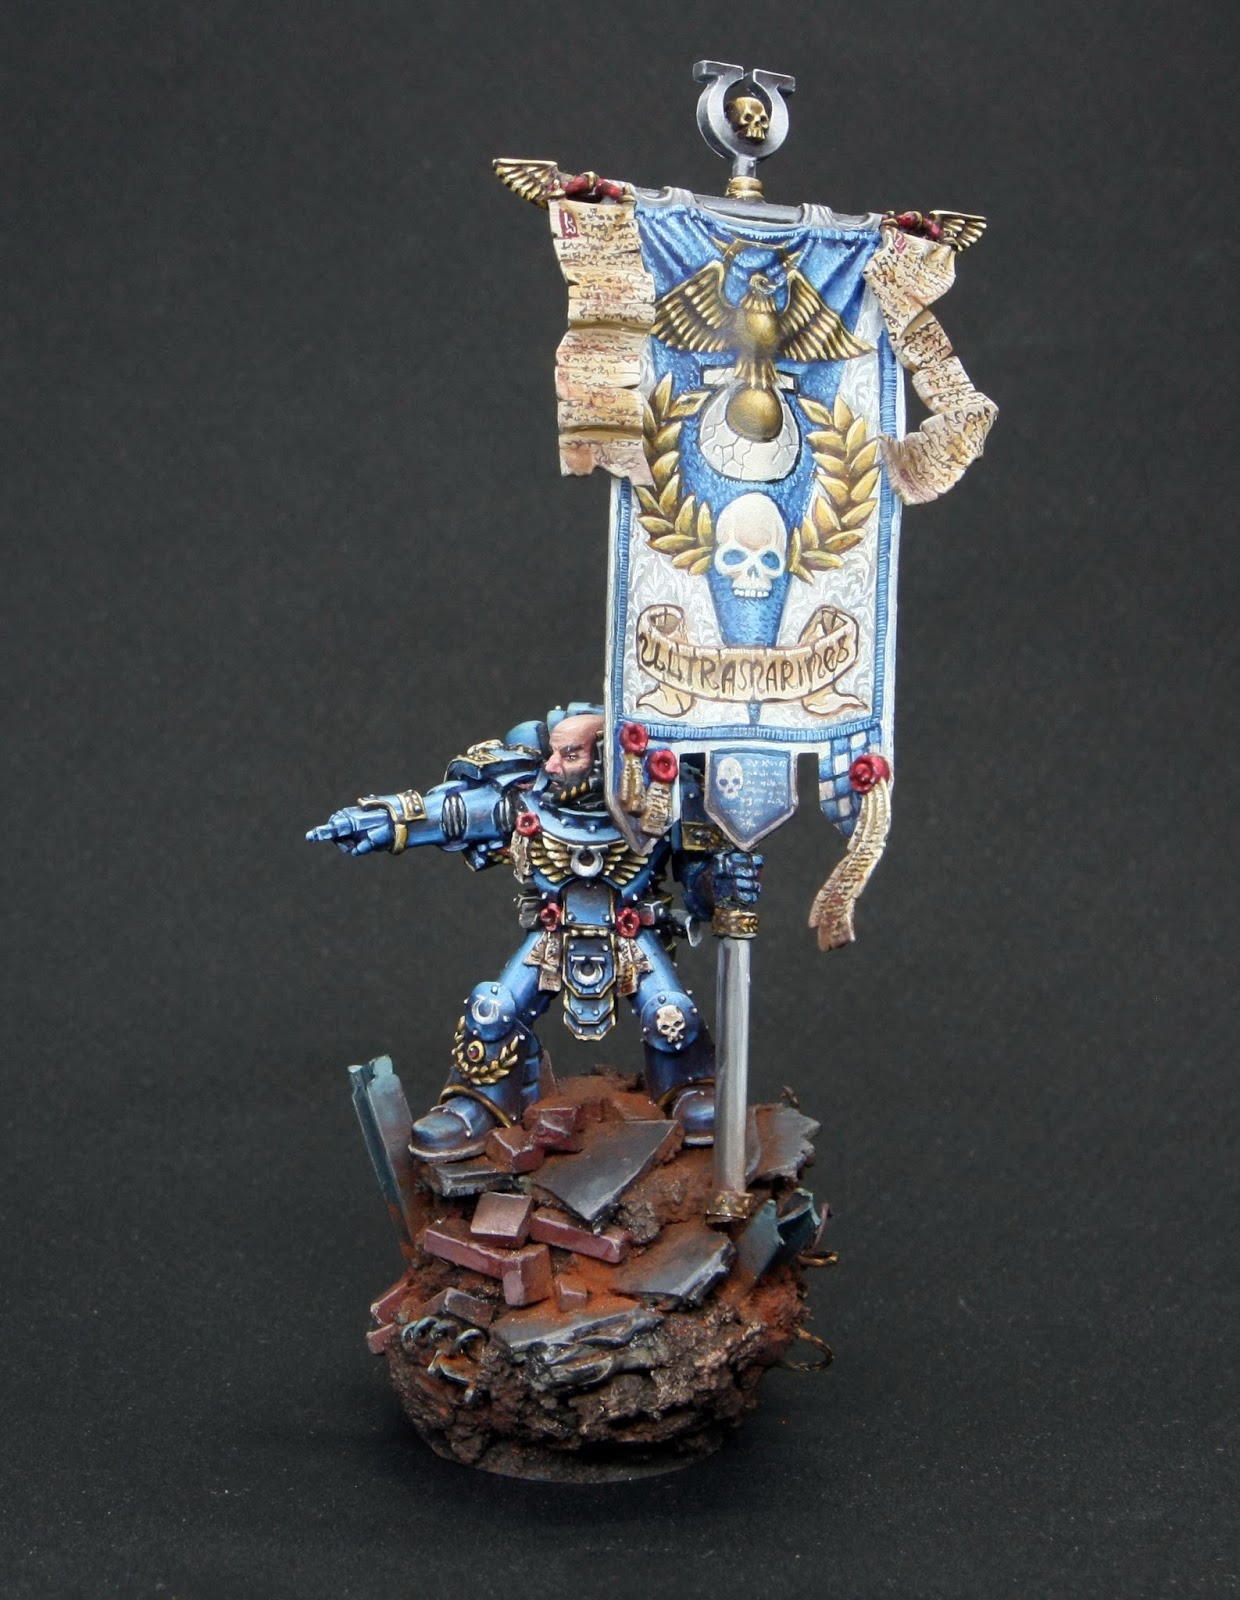
Finally I added red-brown shadows on the banner and washed scrolls with sepia.


Base.
Painting and adding pigments:

Head.
My mistake was to leave this element fo the last part. I was tired from sergeant so I was in hurry and painted the face without any enthusiasm and desire. That's why I'm not satisfied with the result.
Good tutorial for painting faces I wrote under Kirill 's instructions, so I won't repeat it again. Just my results with sergeant's face:
Good tutorial for painting faces I wrote under Kirill 's instructions, so I won't repeat it again. Just my results with sergeant's face:

Yeah! Final pictures!


Awesome display piece, thanks for sharing your techniques!
ReplyDeleteVery nice. The use of the metal mini to see where the reflection are is particularly helpful as I struggle to work out the actual position on my minis.
ReplyDeleteWow the emperor would be proud skills what's your Instagram like to see you're over work
ReplyDeleteПодскажите, пожалуйста, какую кисть Вы используете для мелких деталей? Номер и марка производителя?
ReplyDeleteЯ пользуюсь кистями Черная речка, размеры 0 и 1.
Delete